The editor
Everything here is non-destructive. The photograph on screen is the original plus a recipe, recomputed every time; the recipe is what gets saved, copied, pasted and put in a preset.
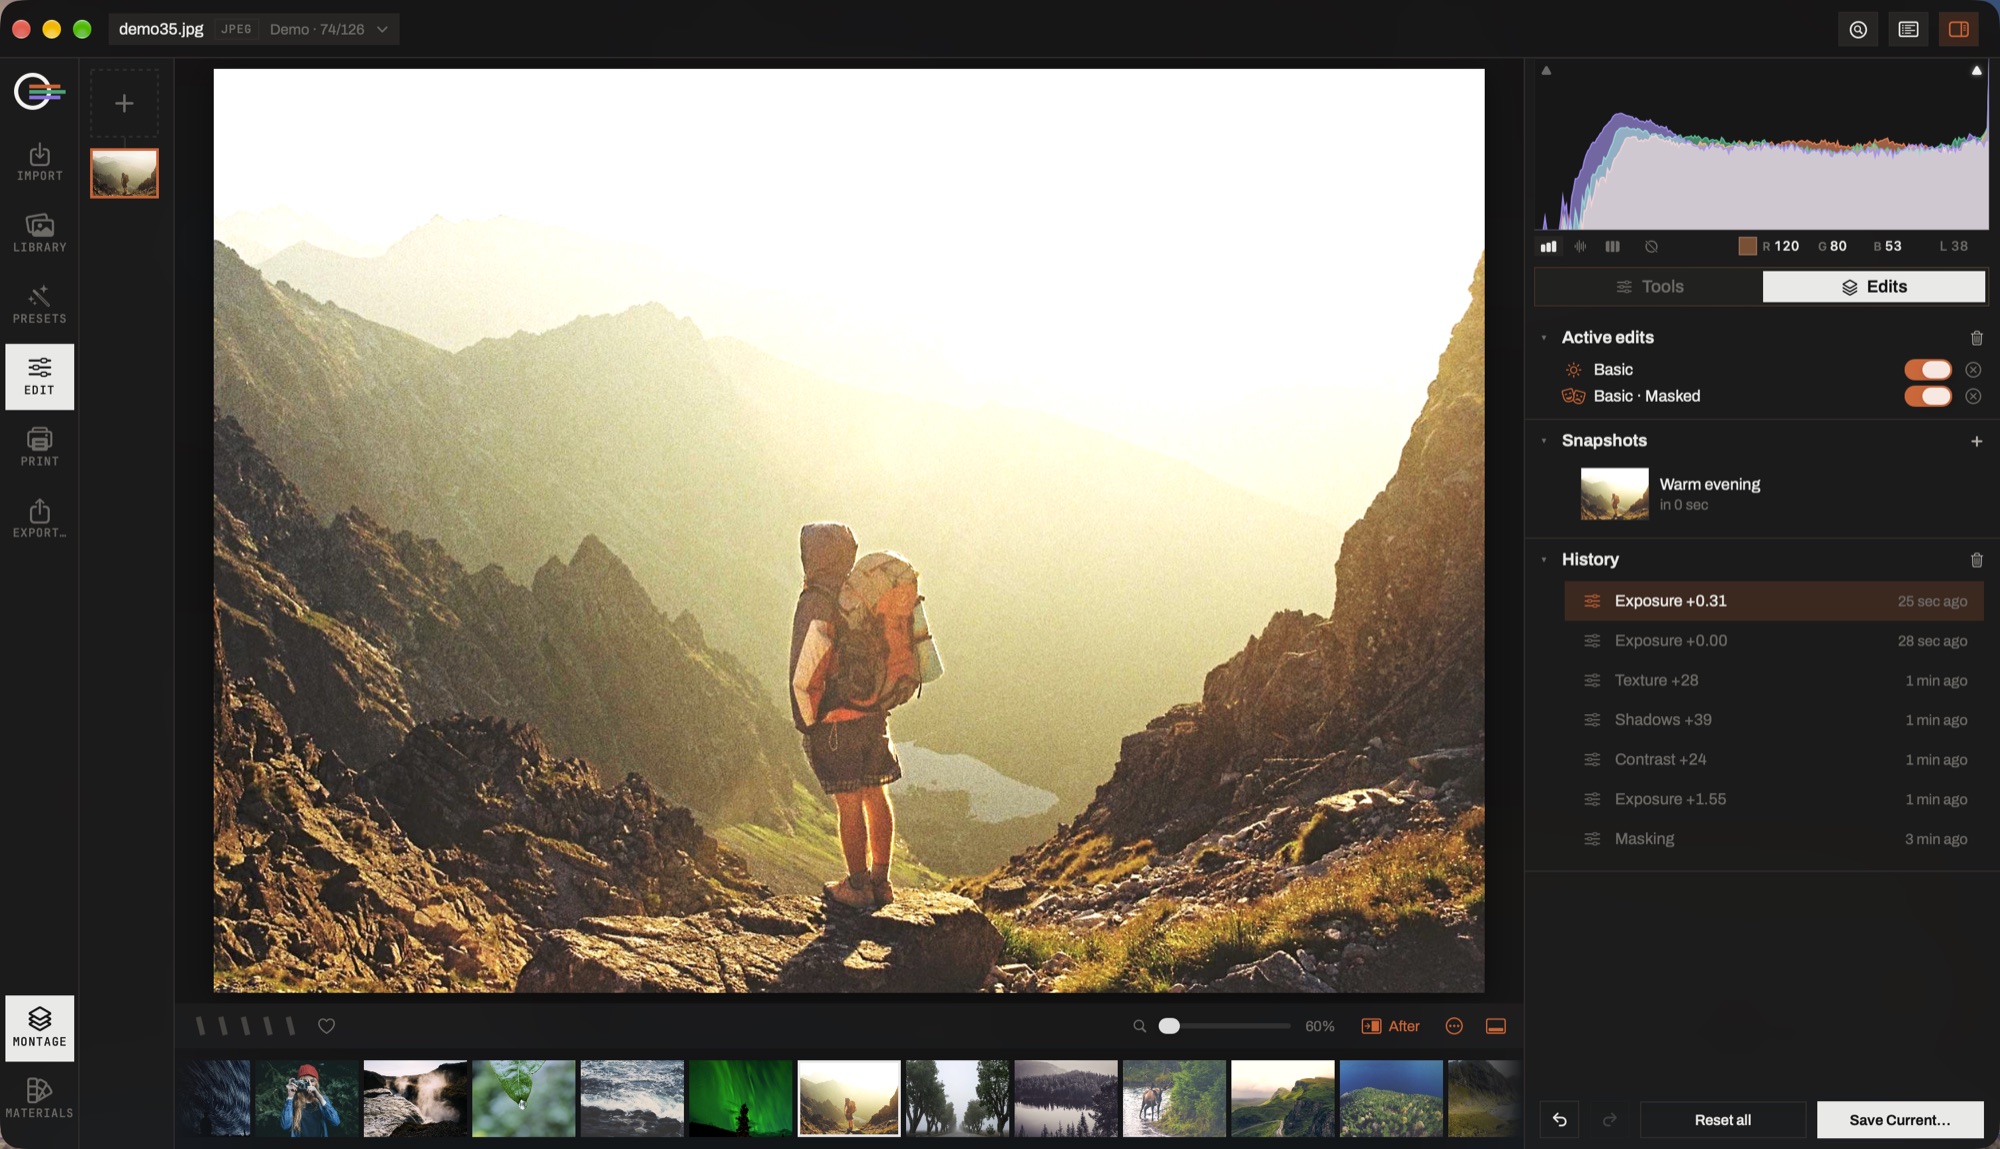
- The scope and the readout. Histogram, waveform or RGB parade, with the pixel under the pointer read out beside it — R, G, B and L*, in Display P3, the working space.
- Tools · Edits. The panels, or this: the list of what is on the photograph rather than the controls that put it there.
- Active edits. One row per section, each with its own switch. Turn a section off to see what it was doing; nothing is lost.
- Snapshots. A named look you can come back to, with a thumbnail of what it was.
- History. Every change as its own entry, newest first. Click one to go back to it; it lasts as long as the app is open.
- The foot of the canvas. Rating, zoom, and the before/after switch — or just press and hold anywhere on the photograph.
Working across photographs
- Copy the current settings
- ⇧⌘C
- Paste them onto the selection
- ⇧⌘V
- Synchronize a chosen set across the selection
- ⌥⇧⌘S
- Undo · redo
- ⌘Z⇧⌘Z
Synchronize is the one that asks: it lets you send the white balance and nothing else, or the whole develop but not the crop. Undo is per photograph and lasts as long as the app is open.
A virtual copy is the other way to keep two readings of one file — a colour version and a black-and-white one — without copying a byte.
Seeing what you are doing
- Before / after
- Press and hold anywhere on the photograph to peek at the original. \ toggles it and Y cycles the split and side-by-side modes.
- Zoom
- Z or Space toggles fit and 100%, ⌘+ and ⌘− step it. Zoomed in, only the visible window is re-rendered at the resolution the zoom asks for, so 100% is sharp without the wait — and zooming back out is instant, because nothing was thrown away.
- Crop preview
- R opens Crop & Straighten from anywhere.
The scopes and the readout
Pinned at the top of the inspector, on every surface that borrows that column — the tools, a layer's settings, the preset browser — because they read the photograph rather than the tool, and losing them on a surface swap would take away the exposure reading exactly while you are changing the exposure.
- Histogram
- How the light is distributed.
- Waveform
- Where in the frame it sits. A panorama seam, a graduated filter a few degrees off, a sky a third of a stop brighter on one side — all invisible in a histogram and obvious here.
- RGB parade
- A cast that changes across the frame, which the global white balance cannot fix and a linear-gradient mask can.
- Pixel readout
- The value under the pointer, in Display P3, with L* and a neutral indicator beside it — 250 and recoverable, or 255 and gone.
One at a time, because the column has room for one plot and nobody reads four graphs at once.
Edits, history, snapshots
Three lists, in the tab beside the tools.
- Edits
- What is currently on the photograph, tool by tool. Each row can be switched off or removed, which is the quickest way to ask "what is this one doing?"
- History
- Every step you took, in order, back to the import.
- Snapshots
- The states you named yourself — the way to keep a version you can come back to without making a virtual copy.