Presets & profiles
A preset is a saved look; a profile is the file's starting point. Both are browsed the same way — drawn on your own photograph before you choose one.
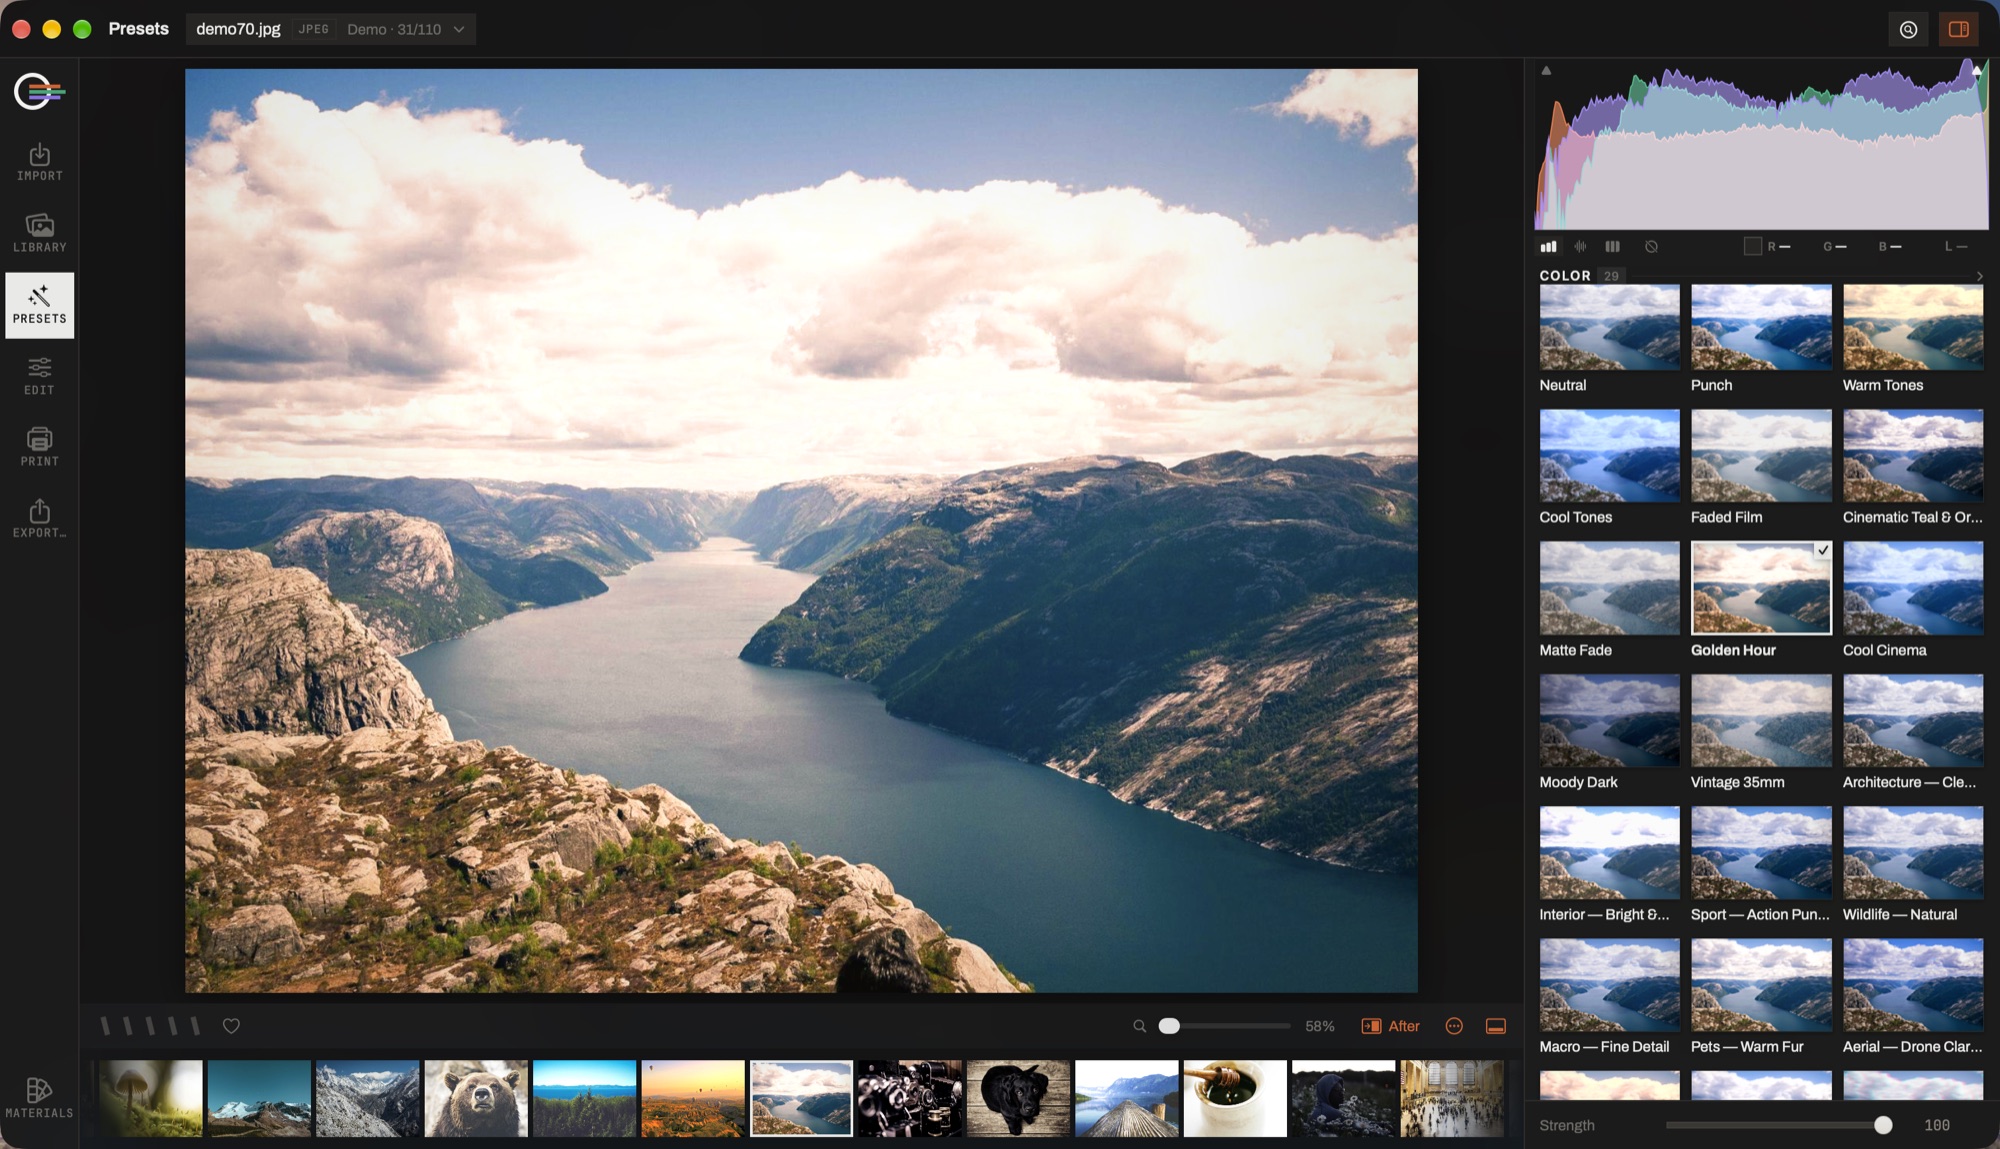
- The photograph. Full size, with the look on it. Press and hold to see it without.
- The packs. Your own first, then the shipped ones by subject. Every card is this photograph rendered through that preset — which is the only preview worth having.
- The tick. What the photograph is wearing now.
- Strength. 0 to 100, always re-scaled from the same base, so 40 and then 90 lands exactly where a direct 90 does. What it leaves behind is ordinary editable values.
- The filmstrip. Step through the folder without leaving; the look stays on the photograph you left.
Presets
A preset carries the tone and colour settings and nothing tied to one frame: not the crop, not the masks' geometry, not the retouch spots, not the depth focus. That is what makes one usable on a thousand photographs.
The browser draws every preset on the open photograph, in categories — film, cinematic, portrait, landscape, street, the print and art processes — with your own under User and a favourites tab. Hold a tile to peek at it full size.
Strength
A preset always lands whole; the slider under the grid then fades it, live, and resets to 100 when you apply another one.
What it leaves behind is ordinary slider values you can keep editing — not a blend you cannot take apart. It fades the amounts and leaves the shapes: a grading's saturation comes down, its hue does not, because rotating a hue toward red is a different grade rather than a weaker one. A grain's amount fades; its particle size does not.
50% is not "half the visual difference" — the pipeline is non-linear. It is every slider at half value, which is what a photographer means by half a preset.
Your own presets
Save Current turns this photograph's settings into a preset. They are files in a folder — one document per preset, named the way you named it — so a rename is a rename, a backup is a copy, and the Finder shows what the browser shows.
They belong to the installation rather than to one catalog, so a look you built is available in every catalog you open. They can be filed into categories you invent, which sit at the top of the browser above the shipped ones, and a small accent dot marks which tiles are yours.
Lightroom .xmp presets import as they are.
Profiles
Where a preset is a look laid on top, a profile is how the file is read in the first place — the camera's own rendering, or a LUT you have installed. The same browser shape: drawn on your photograph, at a strength, with favourites and a default per camera, so every RAW from that body starts where you want it.
Match Look and LUT export
Match Look reads a look out of a reference image — a film still, a painting, another photograph — and rebuilds it in the app's own sliders, which stay editable afterwards. It transfers the distribution, not the pixels, and can be limited to tone or to colour. The panel shows the reference's palette beside the result's rather than a match percentage, which would be invented precision.
Export LUT bakes whatever the photograph is wearing into a
.cube file for use elsewhere — and names, in the panel, the controls a colour
table cannot carry. Every LUT has that limit; few applications mention it.