The window
One window, three modules, the same shape in each: what you are choosing from on the left, what you are looking at in the middle, what you can do to it on the right.
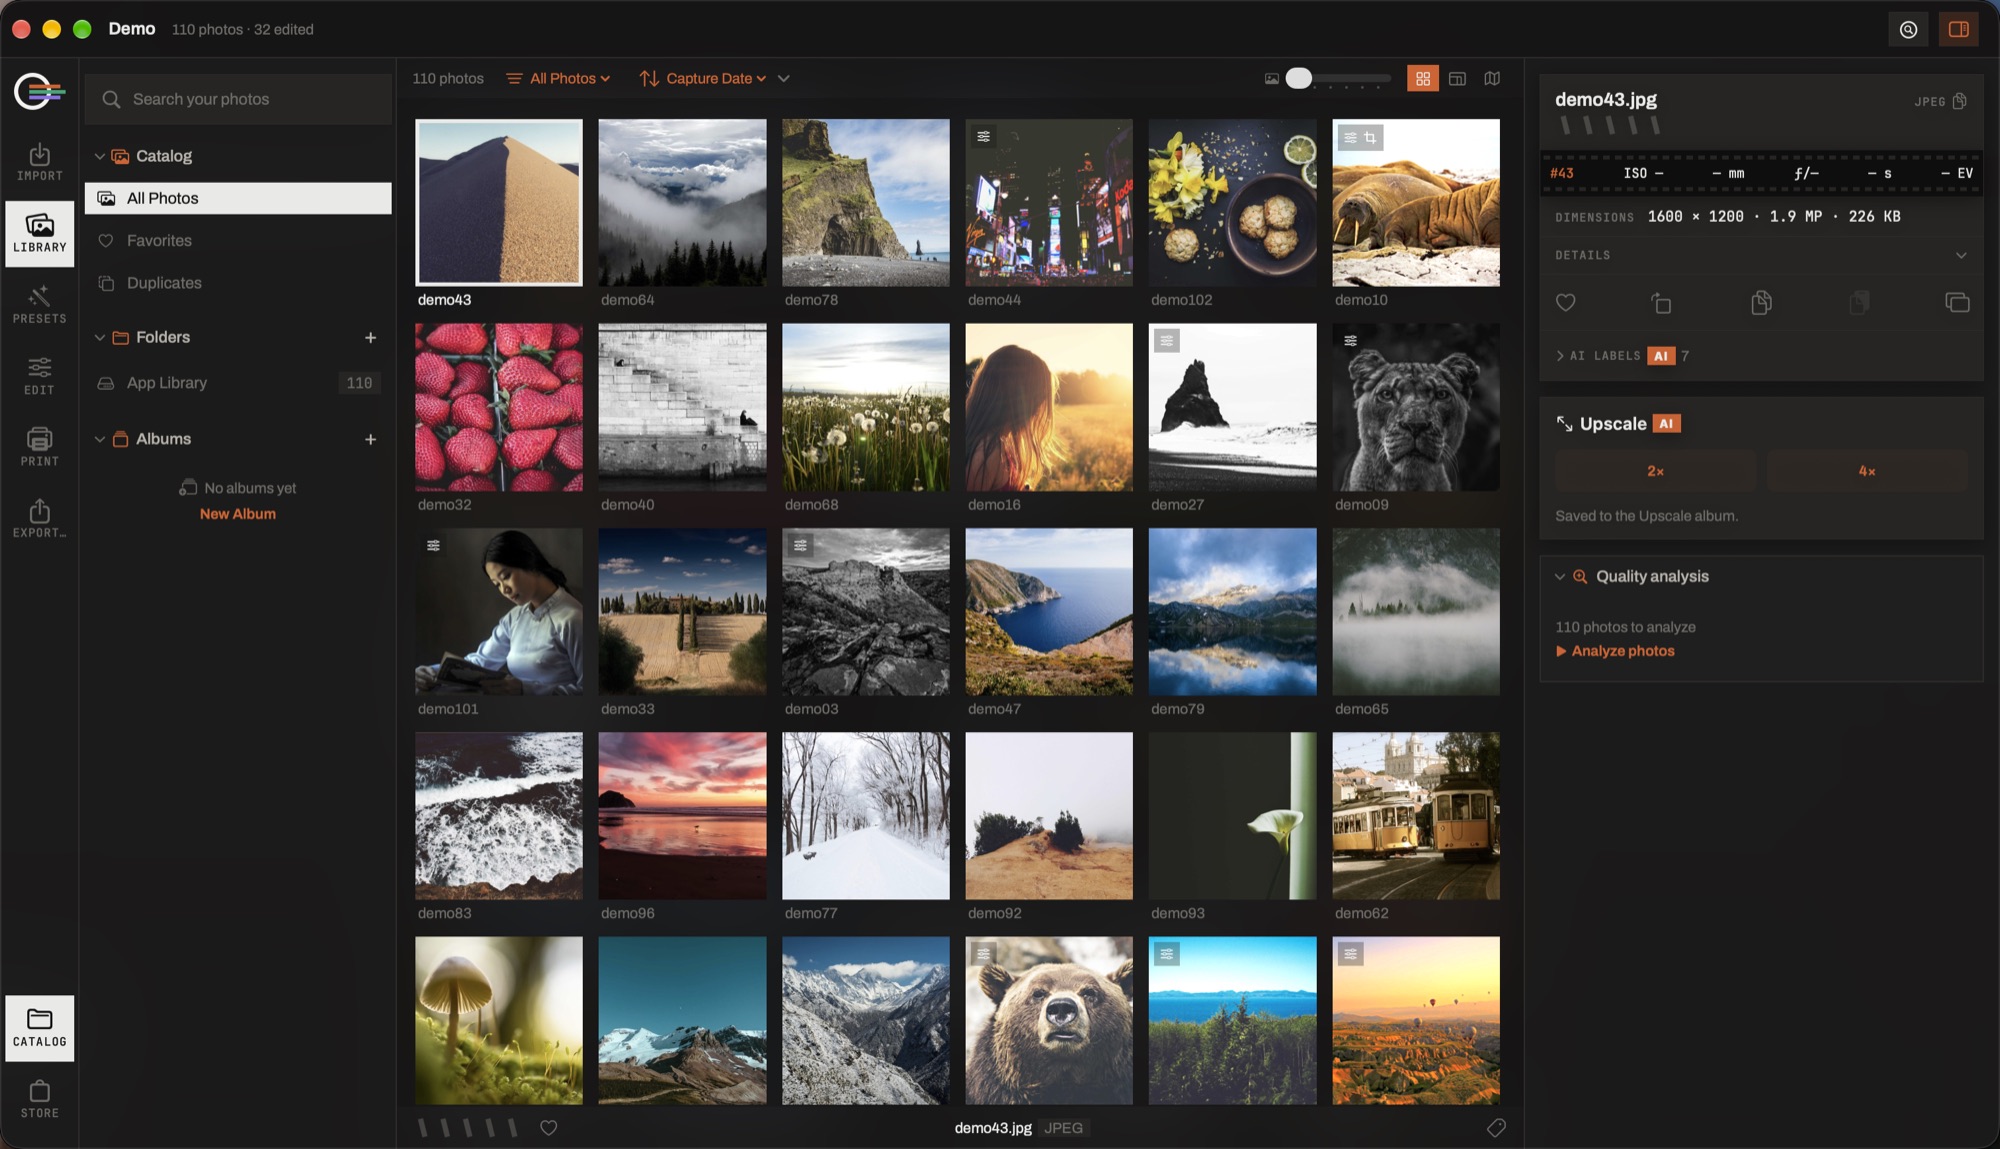
- The module rail. Import, Library, Presets, Edit, Print and Export, top to bottom, with the catalog button at the foot. The mark above them opens Settings.
- The left column — what you are choosing from. Folders, albums and collections here; the montage chain in Edit, the pages in Print.
- The centre — what you are looking at. The grid, the photograph, the spread. It is the only column that is never taken away.
- The bar above it. How many photographs, which set, in what order, at what size, and as a grid, as tiles or on a map.
- The right column — what you can do to it. Information and the library actions here; the tools in Edit, the page inspector in Print.
- The foot of the window. Stars and the favourite for whatever is focused, and its name.
The parts of the window
- Module rail
- The left edge: Import, Library, Presets, Edit, Print and Export, with the catalog button at the bottom. The mark at the top opens Settings.
- Left column
- Named by whoever hosts it — the catalog in Library, the Montage in Edit, the pages in Print. It is opened and closed from the rail.
- Centre
- The grid, the photograph, or the page you are laying out. Everything else in the window exists to serve it.
- Inspector
- The right column: the tools, a layer's settings, a page's settings. Where a module has nothing to put there, the button that opens it is not drawn.
- Filmstrip
- The bottom strip: the current selection, browsable without leaving what you are doing. In Print it switches between the book's own photographs and the library.
Go to… ⌘K
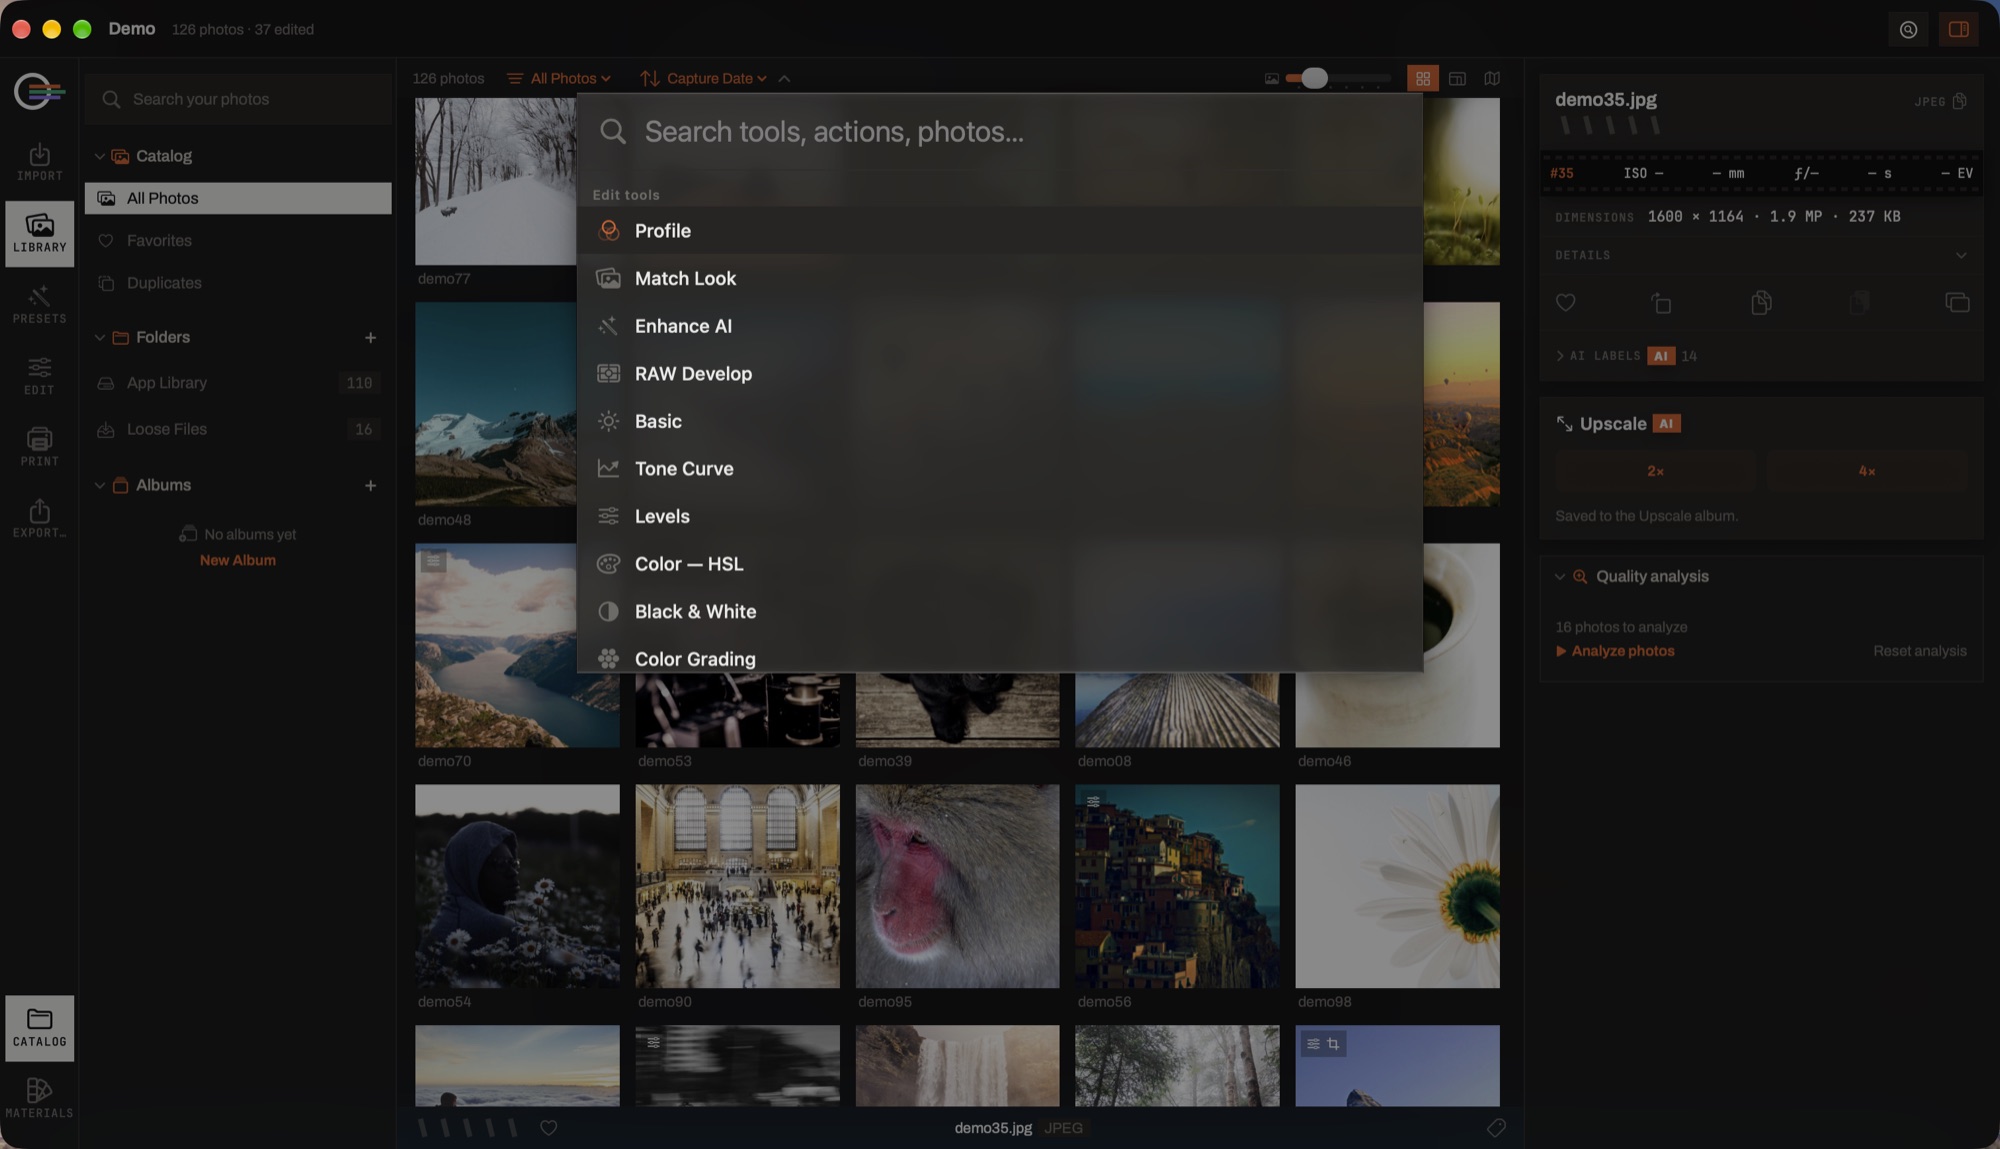
The command palette. Every tool, every panel, every layout and most actions are reachable by typing a few letters of their name — faster than remembering which column something lives in, and the way to reach a tool whose panel is closed.
⌘/ shows the keyboard shortcuts, ⌘F searches the photographs, and Esc steps back out of wherever you are: out of mask editing, out of the loupe, out of a full-screen preview.
The three Edit layouts
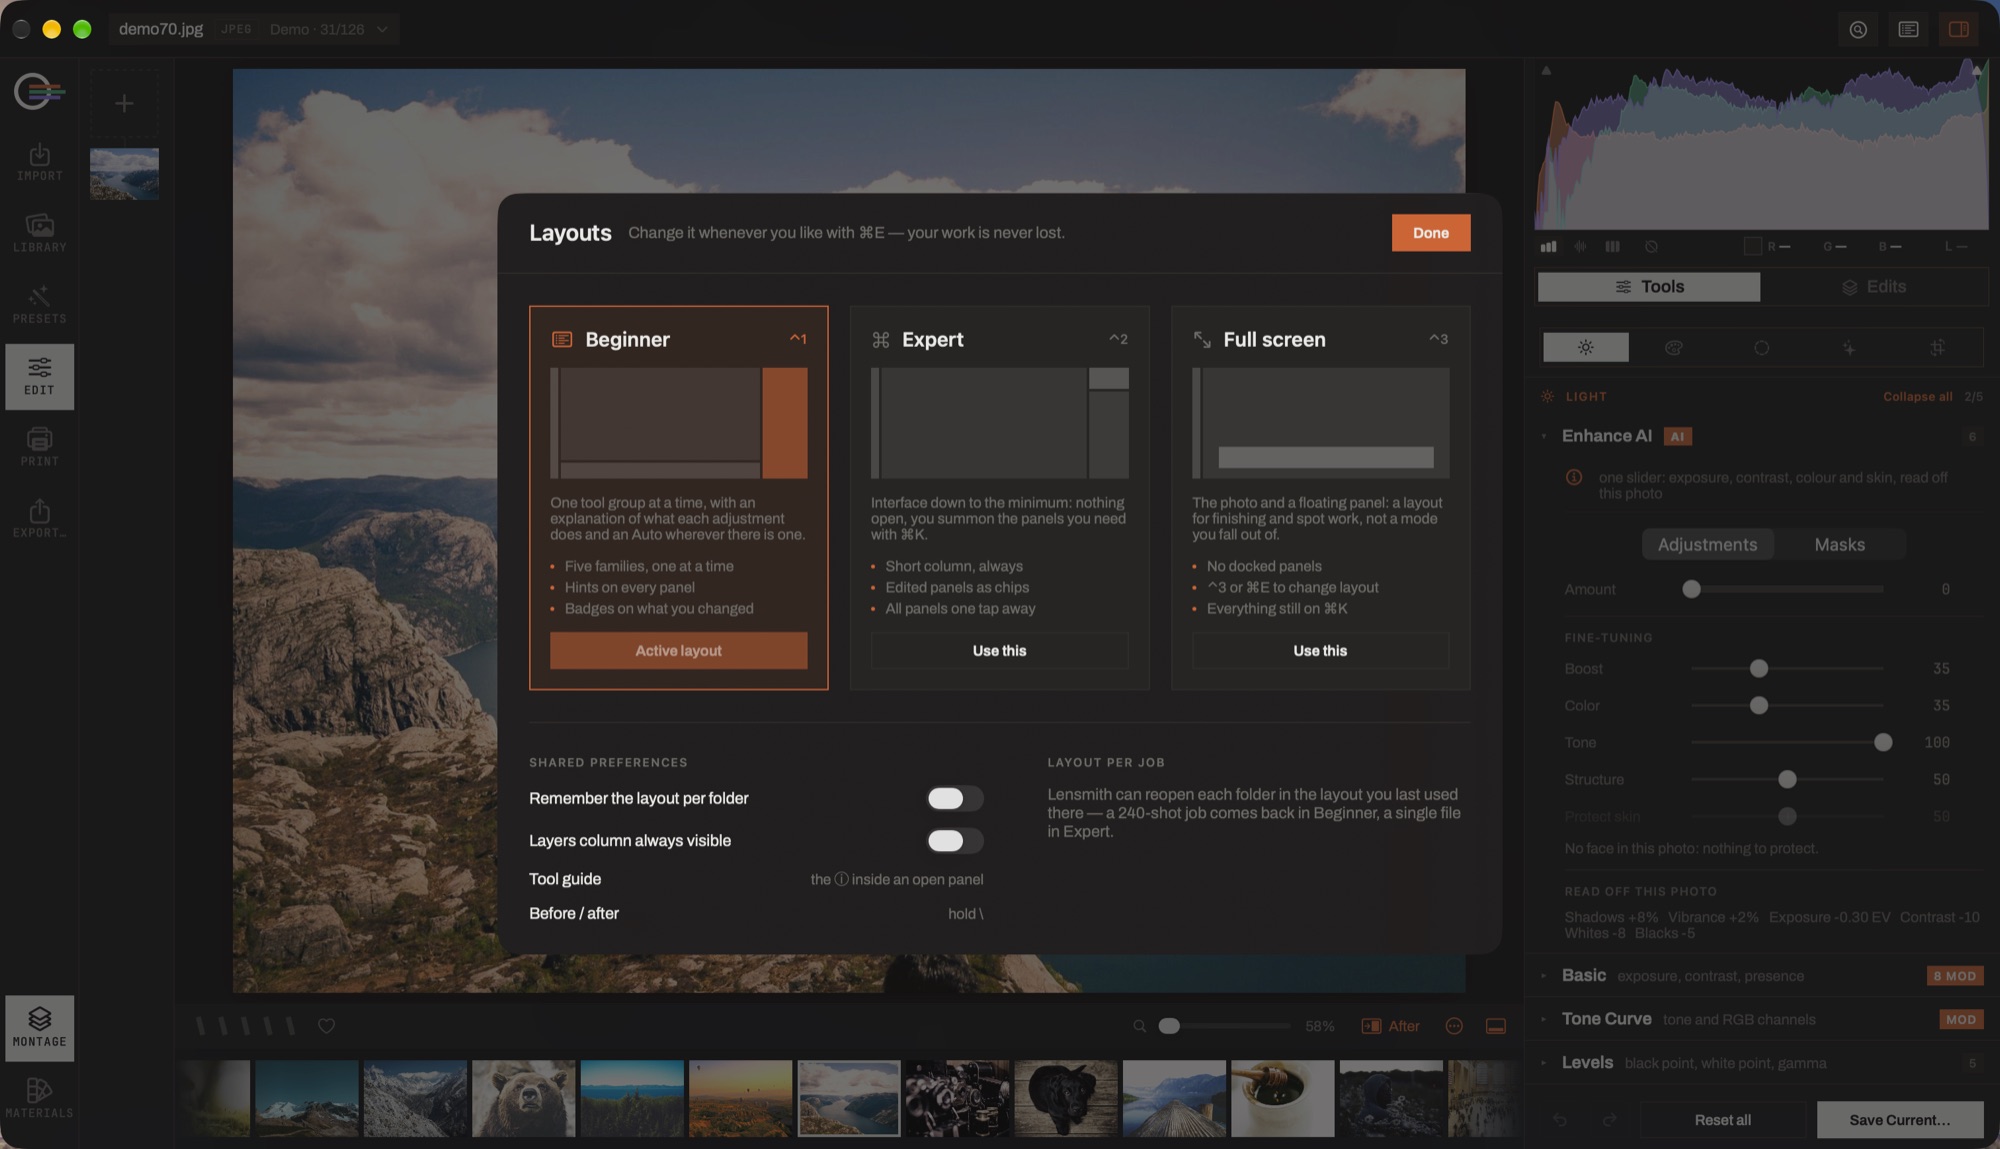
How much of the editor is on screen is a separate choice from which module you are in. The Layouts screen — ⌘E, or the layout button in the Edit header — offers three. Every one of them reaches every tool and reads the same edit, so switching is always safe and always reversible.
- Beginner ⌃1
- Every adjustment panel in one continuous column, with the five families as landmarks in it and a row of icons that jumps between them. Nothing is hidden: the bar navigates, it does not filter.
- Expert ⌃2
- The classic three columns — catalog or montage on the left, the photograph in the middle, the tools on the right.
- Full screen ⌃3
- The photograph takes the whole window and the tools float over it on the leading edge. You leave it by choosing another layout rather than with Esc: one key away from ending is not what you want of the way you have chosen to work.
Settings ▸ Interface also offers two panel styles for the tool column: grouped cards, or the classic accordion. It changes how the panels are drawn, never which ones exist.
The three modules
- Library
- What you have. Folders catalogued in place, the grid and the loupe, ratings and flags, search, culling, the map, and the merges that make a new photograph out of several.
- Edit
- What you do to it. Twenty-six non-destructive tools, masking, the Montage stack, presets and profiles, and the on-device models.
- What you make out of it. Photo books, calendars, postcards and posters, laid out from the same catalog and exported as a print-ready PDF.
They share one catalog, one selection and one set of filters. A photograph picked in the Library is the photograph the editor opens and the one the book offers you.